


Docs with Nuxt Content 📚
Ultimate guide on how to create and roll Docs with Nuxt.js Content 3.0

What you’ll learn from this series?
Why project documentation is so important.
How to create and roll a new Docs app on top of Nuxt.js Content Module.
How to arrange it inside the Turborepo.
Docs application internals:
layouts,
styling,
components,
utilities,
reusability,
scaling.
Advanced techniques of managing data.
How to add Docs to existing Nuxt.js project.
This will be a series, split into two or three articles, With this one we will cover the very basics, and with another one we will dive a bit deeper, covering more advanced stuff.
I have an anecdote at first.
I’ve been building an ecosystem of packages for a framework - one of those side projects that grew organically over time. One package was almost done, just needing a few final touches. But before wrapping it up, I switched my focus into another one. Since this was a side project, progress happened in bursts over several weeks.
When I finally returned to the first package, I hit a wall. How did this thing even work again? The logic that once felt so obvious now seemed like a puzzle. Hours went by as I dug through the code, retracing my own steps like a detective trying to solve a mystery left behind. Eventually, I figured it out, the code quality was good enough - but not without frustration. If I had just taken a few minutes to document the structure, my key decisions about the internal APIs, and intended next steps, I could have saved all that lost time. Bummer.
The lesson was clear: when you don’t document your work, you’re leaving future-you a mess to clean up. Whether it’s in the code or separate documentation, you must write it down. Your future self - and anyone else who touches the project - will thank you. Without documentation, even your own work can feel like a black box after a (just) few weeks away. Again, a few simple notes on structure, key decisions, and next steps can save hours of frustration and make your project easier to maintain, extend, and collaborate on.
If it’s worth building, it’s worth documenting!
I hope this story resonates with you at some point and encourages you to pay more attention to documentation. Since we've started this discussion, let's frame it within our current context: a newly created Nuxt 4 app set up in a monorepo. This is an excellent opportunity to launch a fresh Nuxt app and explore the full potential of Turborepo's capabilities.
OK, so the recommended way to build documentation on Nuxt is by using its official Content Module, Nuxt Content (NC). It provides a comprehensive set of tools, including components, composables, and extensibility utils, making it suitable for various content-driven applications such as blogs, landing pages, and, of course, documentation. You can initialize it along with your current, already-existing project and/or build a fresh, independent application, which we’ll try to do here. No worries, at the end I’ll describe how to achieve it also with a regular Nuxt app. Let’s go!
Go to your apps/ folder and create a new one, named docs, or whatever you like. Inside this folder we need to initialize a new Nuxt application, we can do it by using nuxi (here you can read more about nuxi). Use this command.
pnpm dlx nuxi@latest init(remember? we’re using pnpm now, for everything, if possible 😜)
OK, new application will be initialized. Before we move further we need to clean a bit around common internals. Here - at first - I have ESLint in mind. You can install it along. To do this jump into the apps/docs/ context. There run the installation procedure described here. However, at this very moment we will face doubling the same dependencies and configuration. That’s not prefect situation. This is where the magic of a Turborepo steps in.
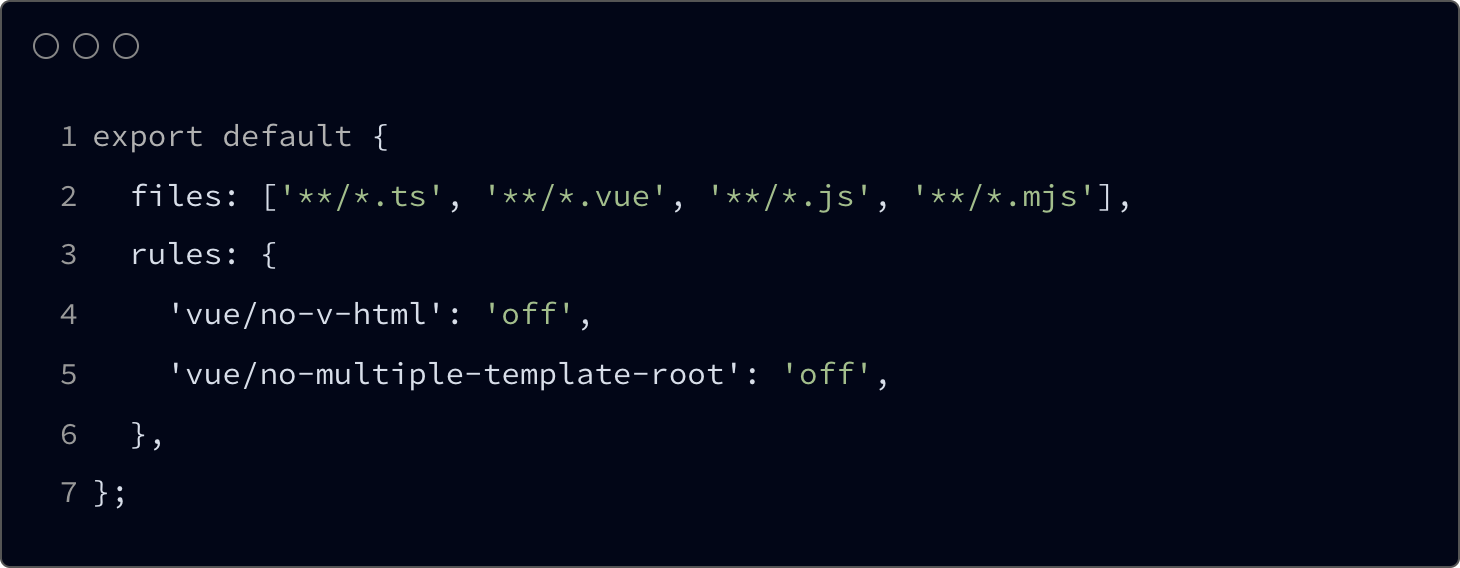
Inside packages/config/eslint folder create a new nuxt.base.mjs file. There paste the Nuxt-related configuration from the apps/web/ app. Like that.
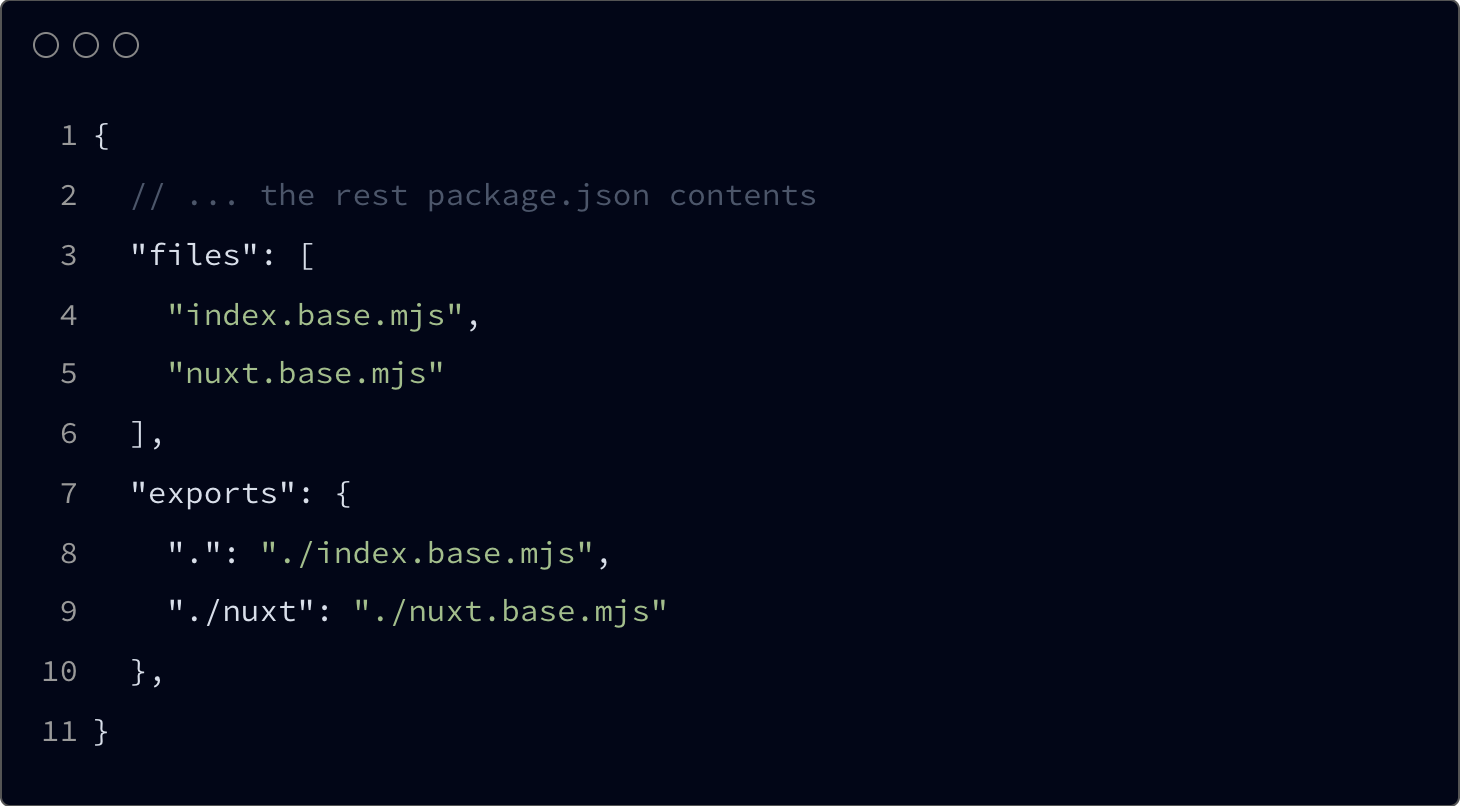
Just after expose this file through your package.json.
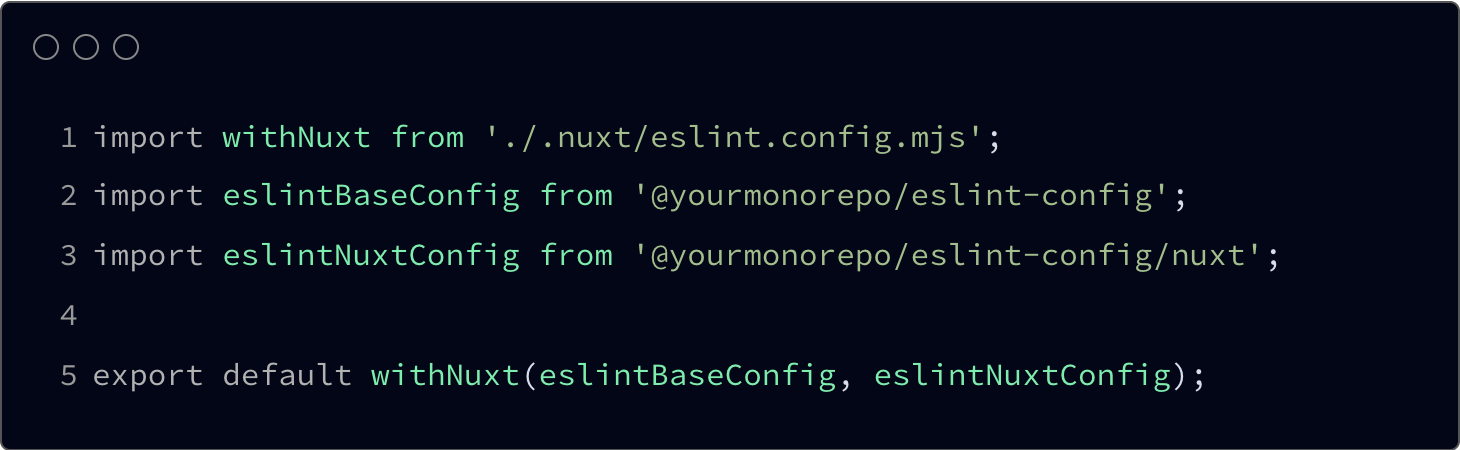
Now as we have our common Nuxt ESLint configuration exposed from the @yourmonorepo/eslint-config package we can use it along with both, apps/web and apps/docs applications. Use it like this.
Yeah - magic of monorepo, you can share lot of stuff the same way, just like that.
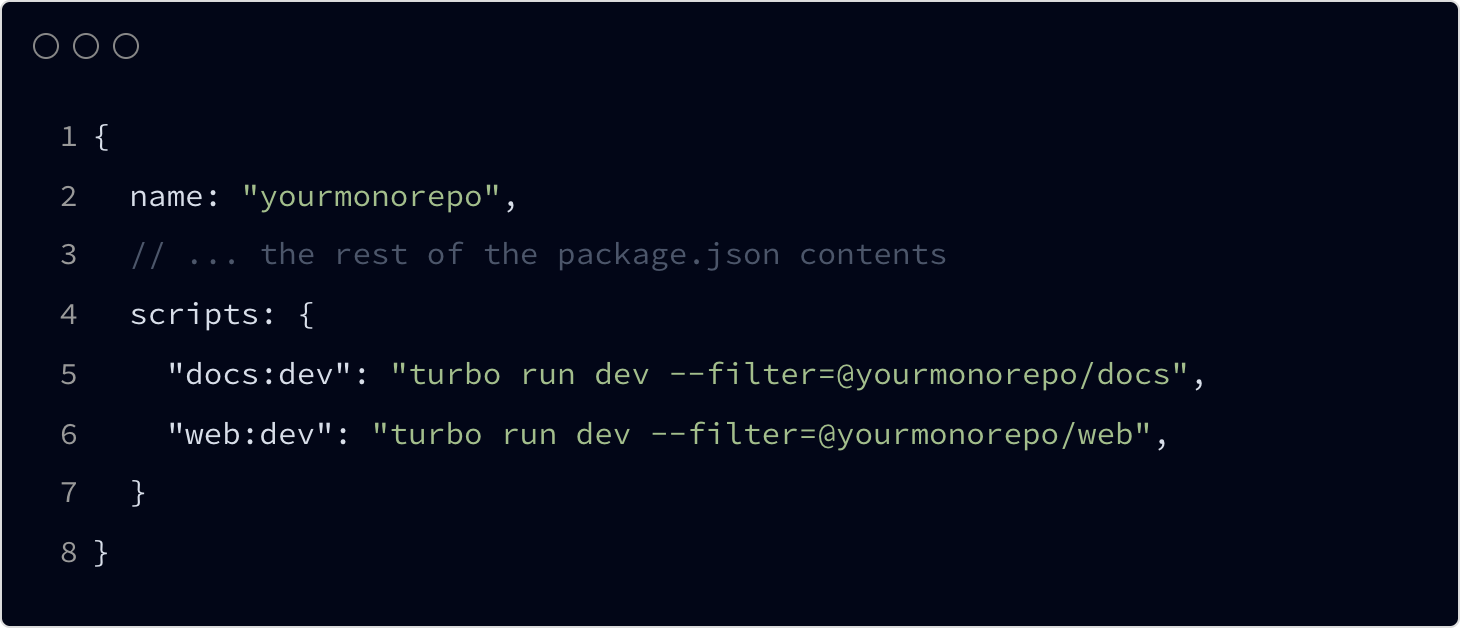
💡 Useful Tip
From the root of your monorepo, inside the package.json file you can add dedicated scripts to run just one app at a time - if you don’t need them going all together. Do it like that.
Awesome! Let’s get back to the main topic, our Docs. I’ve mentioned already that the best way to build Docs on Nuxt is to use their official Content Module, which we will execute right now. Inside your Docs (apps/docs) app please run this command.
pnpm add @nuxt/contentNext, add new module @nuxt/content to the Docs nuxt.config.ts file.
Two more things, before we move on - as we’ve decided to work within the context of Nuxt 4, let’s rearrange our directory structure, as shown and described here.
It would be also beneficial, since we are working within the monorepo environment, to define dedicated port for our Docs app. Add this to your Docs app nuxt.config.ts file.
{
... rest of the config
devServer: {
port: 3010,
},
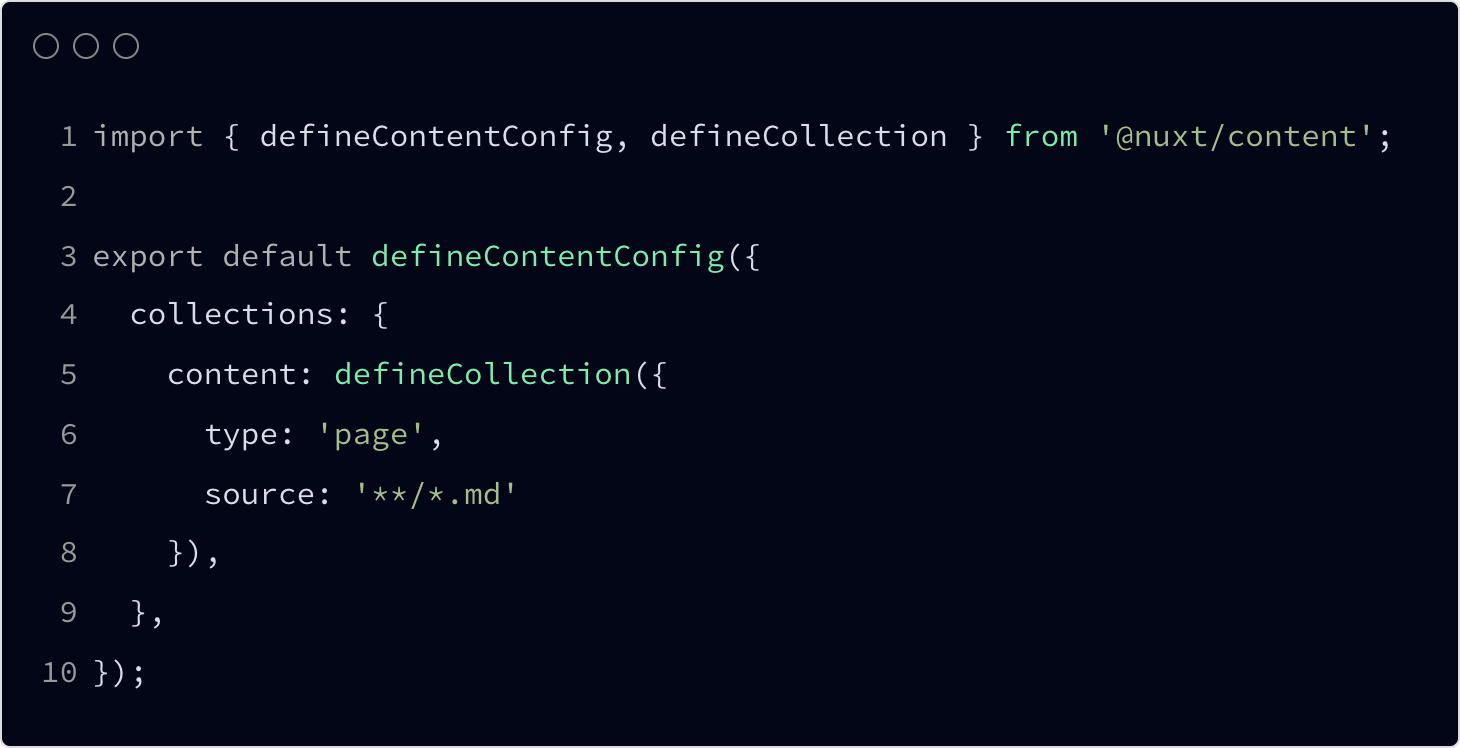
}Great, now we can proceed. Please, inside the apps/docs/ folder create a new configuration content.config.ts file for the NC Module. Like for Nuxt itself NC also need a dedicated configuration. Inside this file define the initial, very minimal configuration. Add collections object and define it’s name by custom key, then use the defineCollection macro function to properly establish the content collection.
Before we move forward I’d like to highlight the key mental model that is crucial for working efficiently with Nuxt Content. The most important thing to understand is that you're still working with a regular Nuxt application, meaning you can do everything you would in any other Nuxt project. The NC simply adds extra capabilities for reading, rendering, and managing local content written in markdown-like formats. The best way to think about it is as a content database that needs to be handled within your app. You’ll still need pages, components, styles, and logic to properly display and organize your content throughout the application.
The approach to building content applications it’s a bit different that it was within the previous versions. Right now you’re starting with a blank and empty app that will require building overall UI and presentation, which means it has to be covered by you, as a custom implementation (for your company i.e.). You have second option though, using one of the predefined, prebuilt templates. Will get there in a moment.
Perfect, let’s get back to our configuration file. What you can see here (actually, up there) is a definition of our content collection. By default NC will read data from the /content folder, so when you’ll use a dedicated utility to fetch content data, each file will be read and transformed to a dedicated format. By defining type you can select rather it will be a paged dedicated format or raw data one. It might be important for you when you’d need to deliver some custom data structures, it’s more advanced topic though, that we can discuss soon. Finally, by defining source you can point the exact path of the collection source and the files format to be read.
Time for some actions - let’s add a test content. Inside the content/ folder create a new file /content/index.md. Put there this simple code.
---
title: Home
description: Test Home Page
---

# Home
Test Home Page
OK, from that moment you may see some ESLint warnings in your IDE, shown along with the code. In fact, this is a dedicated MarkdownLint added to the NC. Here you have two options to handle these warnings. You can correct the code (obviously, daa), or manage the markdown linter rules from a dedicated file. To do it create a new .markdownlint.json config file inside the root folder of your Docs app. From here you are able to structure the rules for linting your markdown code. So my suggestion here would be to not improve the code syntax and add this notation.
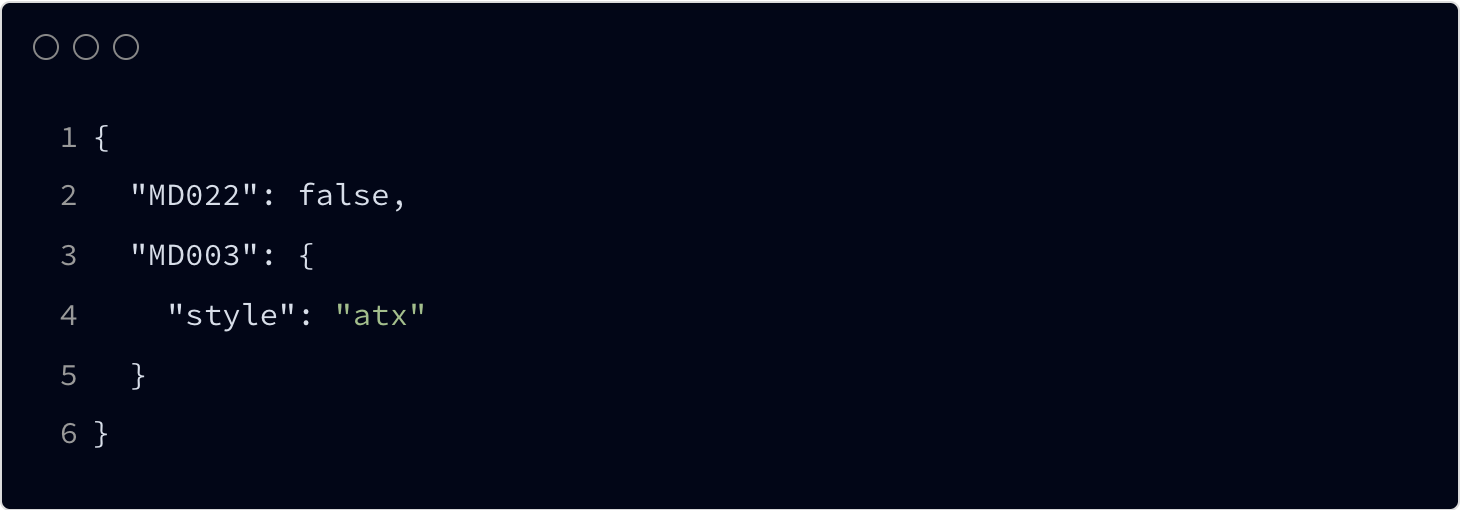
You should see that warnings are gone. You can define your own custom rules on top of this guidelines, or just follow the default, predefined ones. Up to you.
Now, as we’ve defined our very first content file let’s go and display it. Jump into the app/index.vue file and add this code inside.
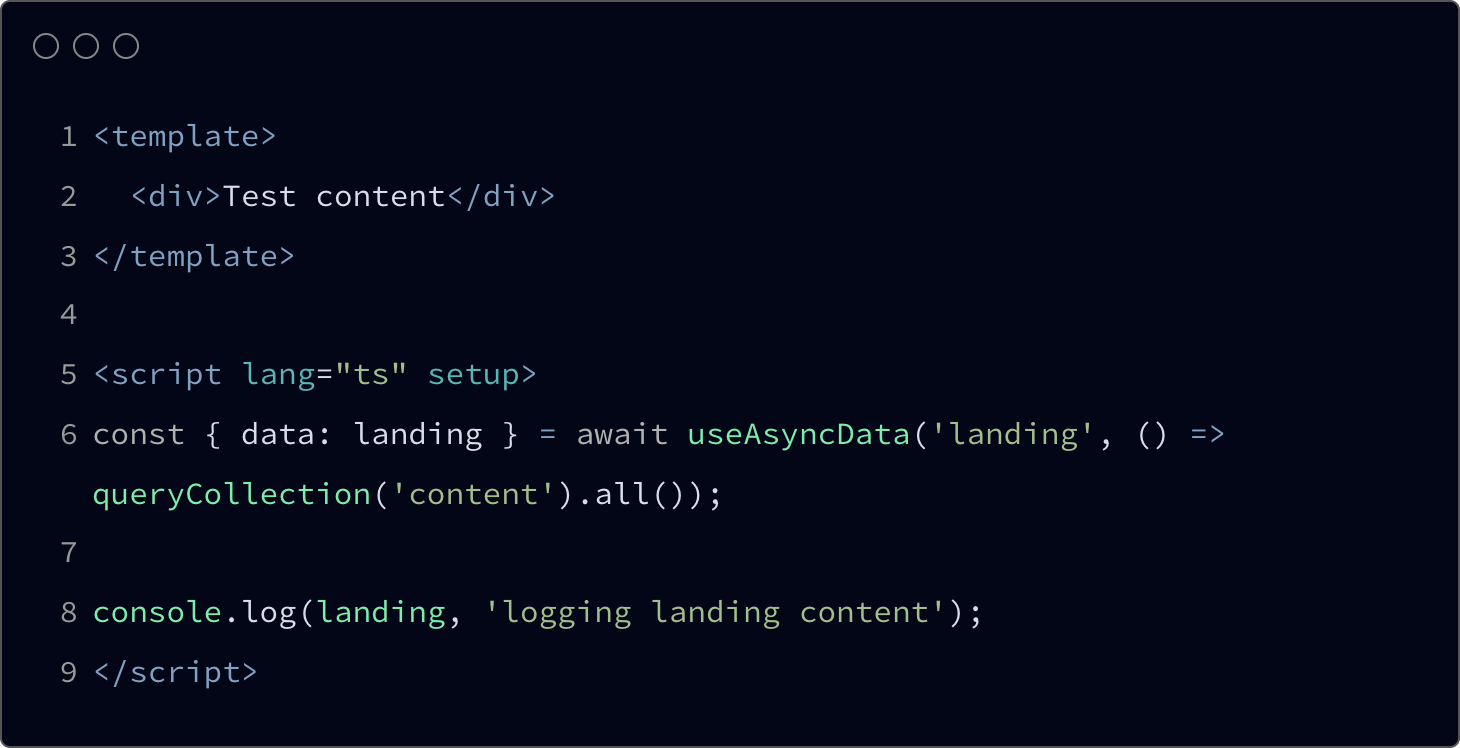
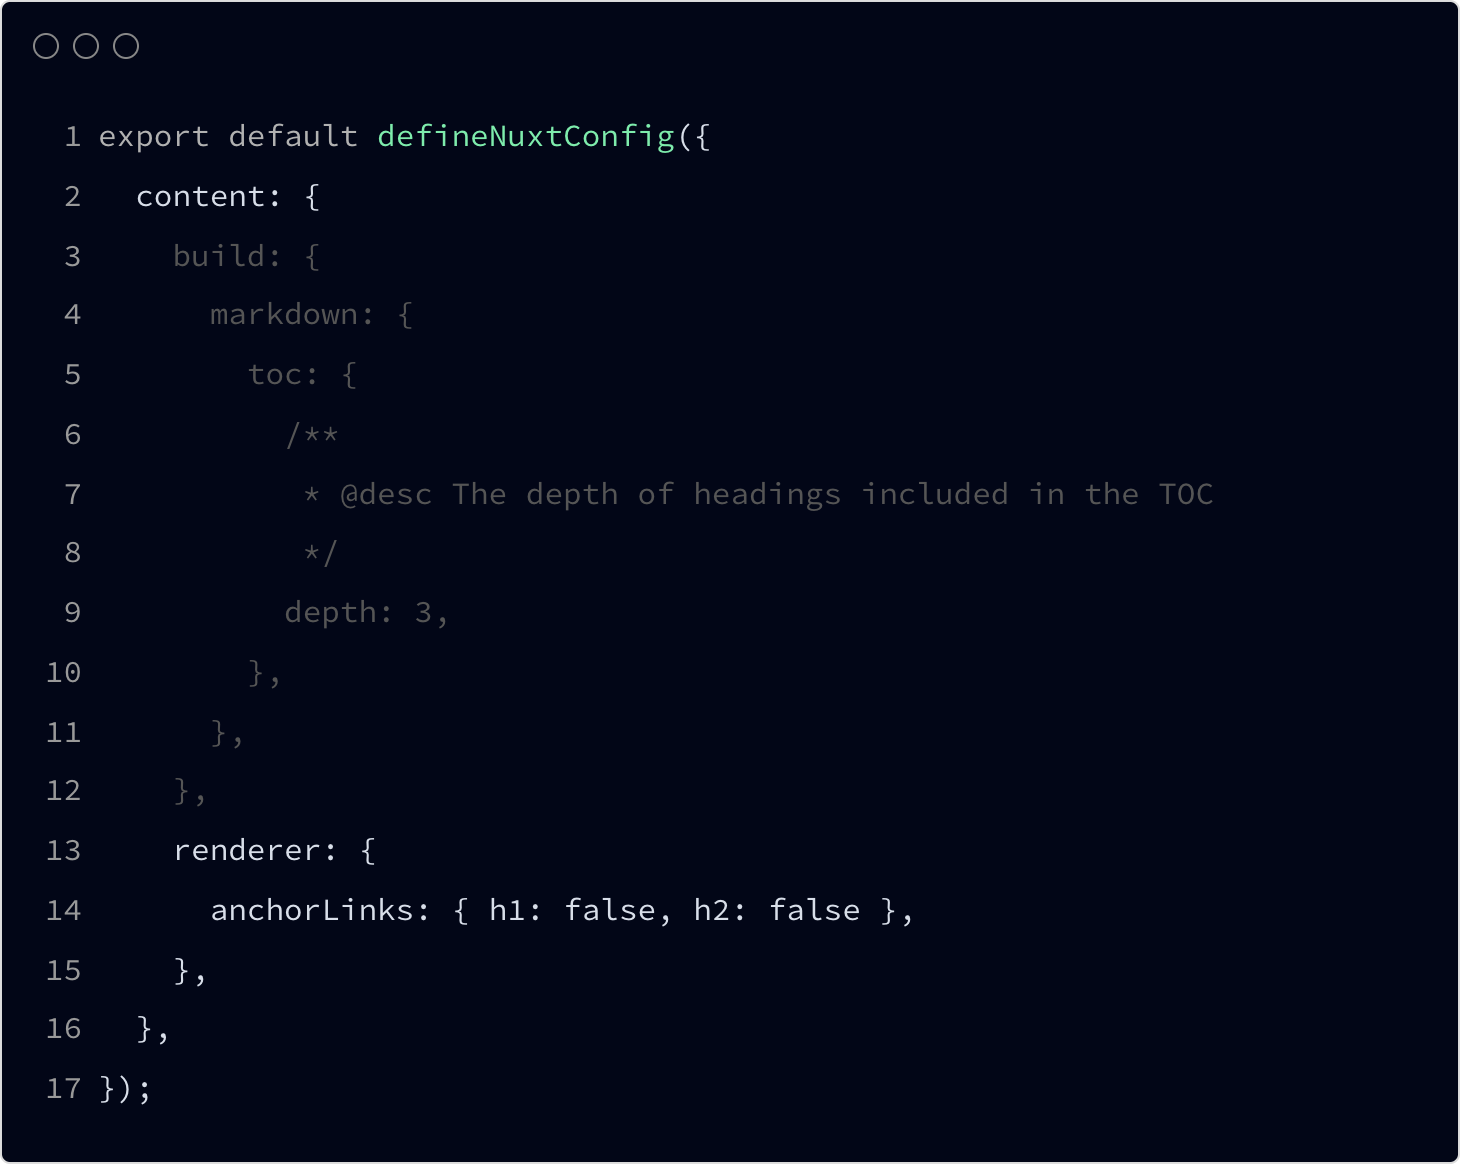
Check out your console now. You should see the ref (dosc) object with your content data. Digg, check out what’s inside. You’ll get there an array with the parsed index.md file data that we’ve just created. It will be located within the body object in which you will get the structured value of the content and the table of contents (toc) additional object, that will provide you links for your page navigation. You can decide how deep it should parse the document. By deep parse I mean what level of the document headers should be included within this structure. You can decide about that by defining content configuration within your nuxt.config.ts file. This is because you can still have your content along with the main app, also content configuration might be lined with the Nuxt configuration itself. So this is how it should looks like.
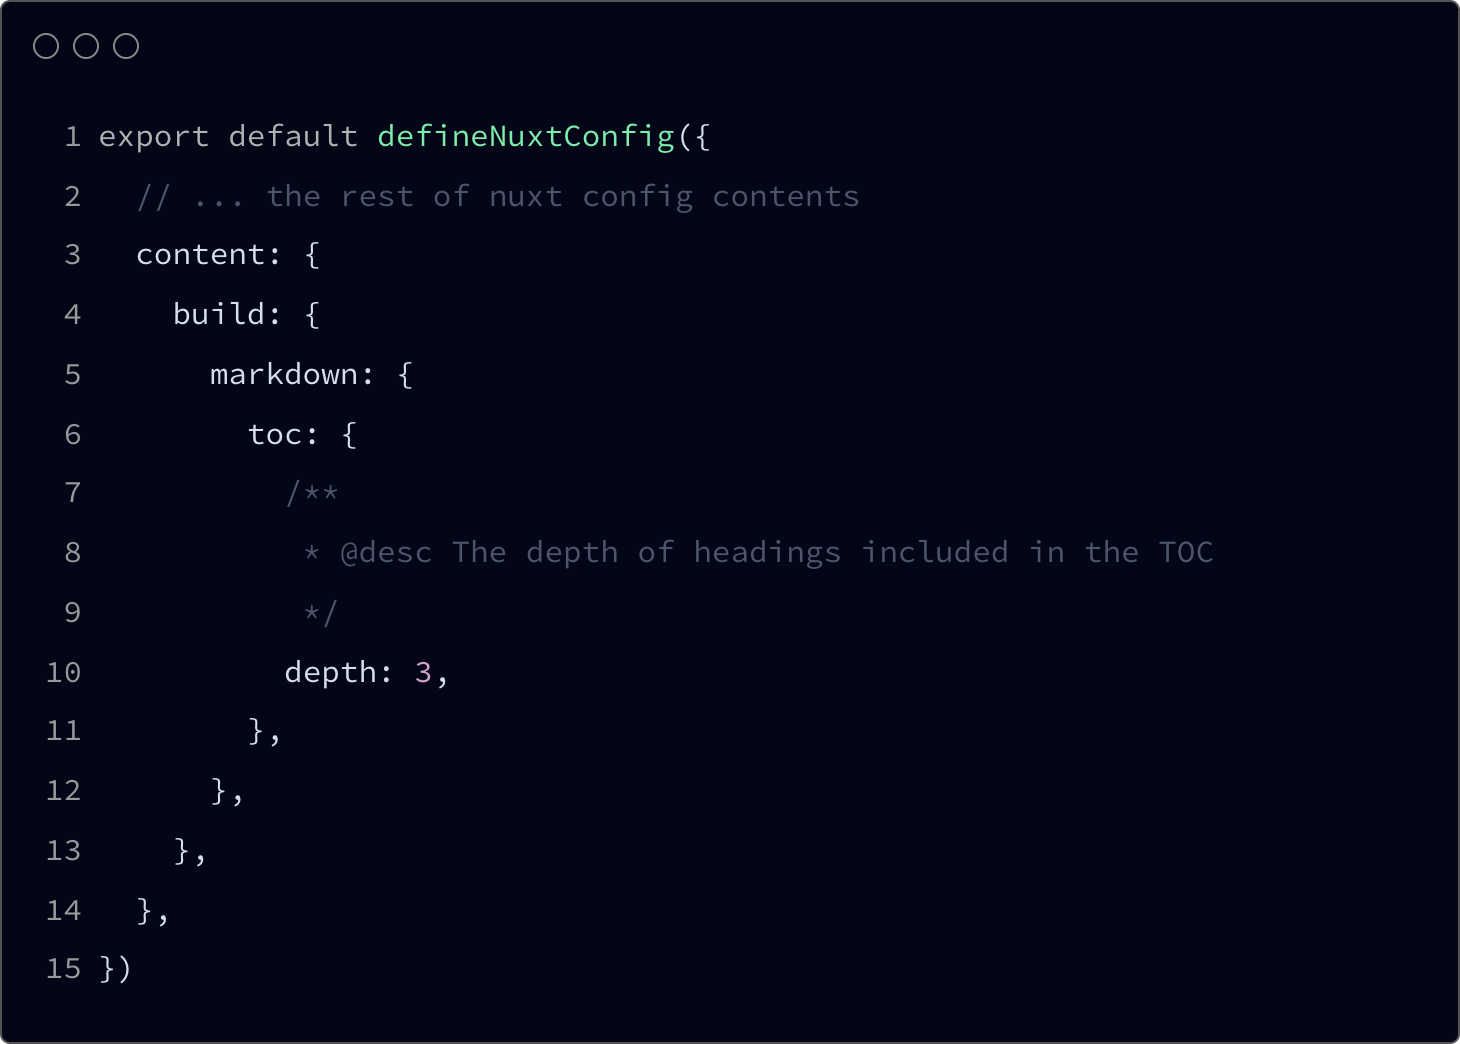
On top of that, when you’ll use h3 hading level (### Header) inside your markdown files it will be included with the toc object, provided by the content fetching utility.
Alright, so as we’ve fetched our content, now it would be ideal moment to display it along with the page. To do so you need to use <ContentRenderer> component. Along with the code of our page it should looks more less like that.
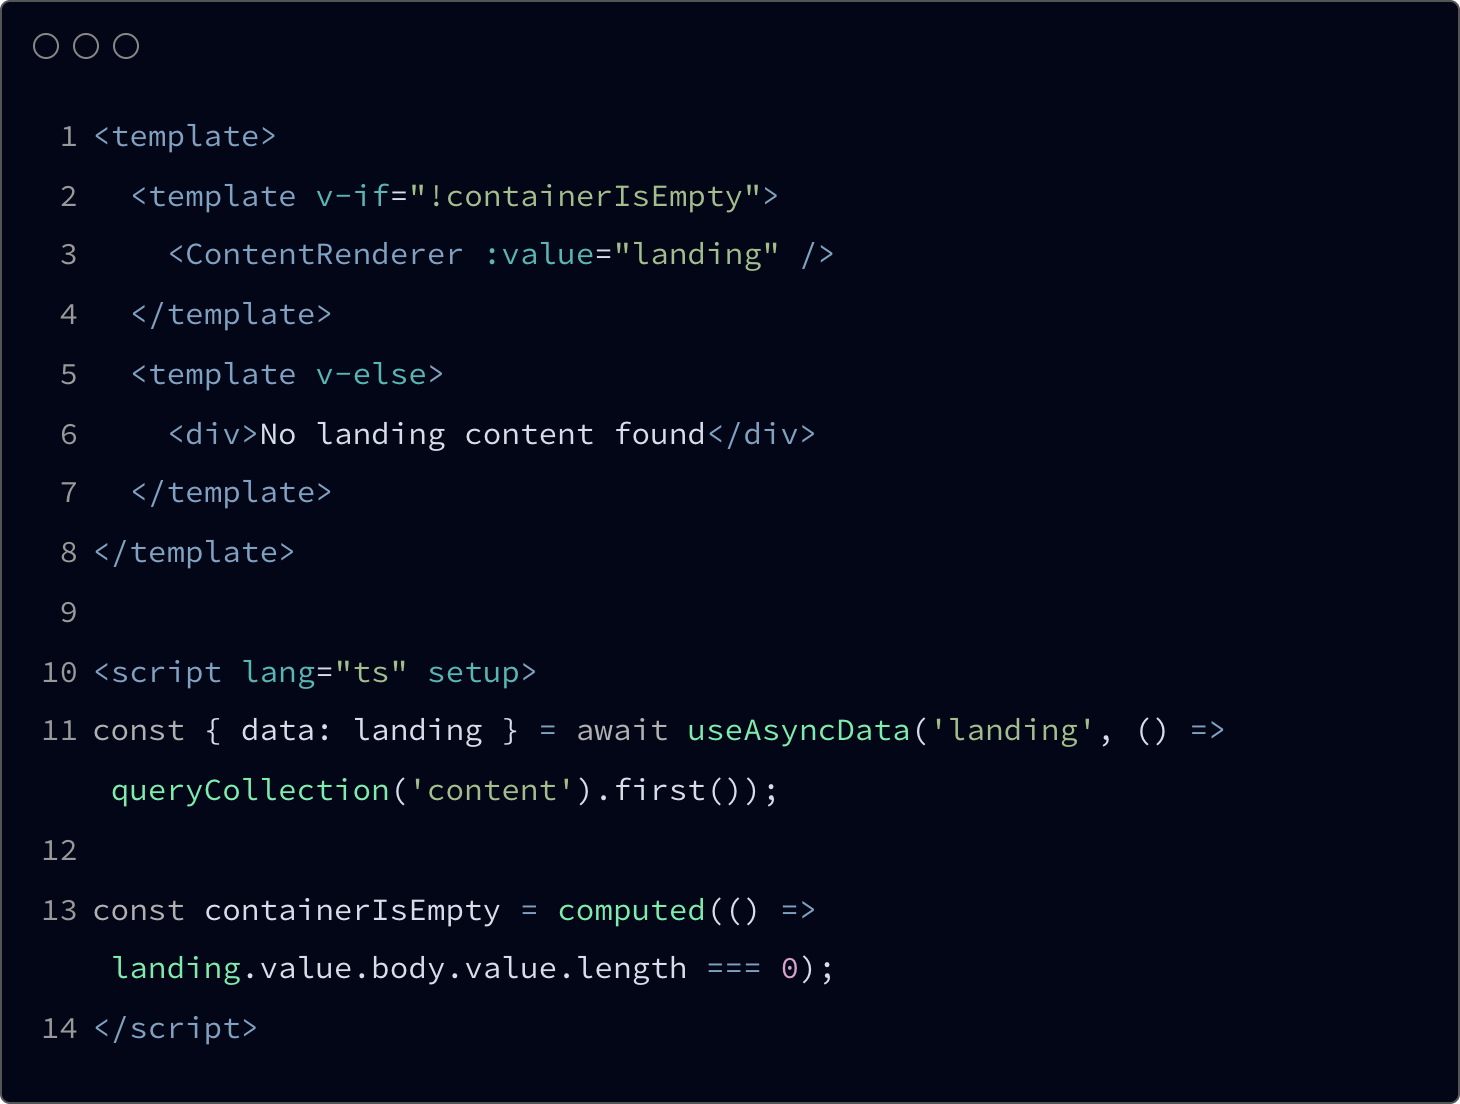
Right, let’s unpack this. Firstly, look at the line 11, where we have already defined content data fetcher. We’ve changed one thing here, now it’s used first() method, not all(). That’s because queryCollection utility with all method chained (as name suggests) fetches all of the pages from the content collection. It’s fine, however to render it properly we would need to iterate over the results, which means to use v-for on top of the <ContentRenderer> component. Also, we don’t need to render all of the pages as one. To be more precise with defining which page you’re actually intended to fetch you can use other methods like select() or where() (more about here).
Next, we have simple computed property containerIsEmpty that will check if the page data even exists and will help us to display proper content along withe the page and its template.
About the template. We’ve added <ContentRenderer> component where fetched data was passed; through the :value property. Additionally we have the condition that is handling either it should show the content or “empty page” placeholder.
Enough talking. You should now see your content rendered on the index page. You should see something like this. Is it there? Yeah? Great!

By default your content will be rendered with the prose components. What are they? Prose components are replacements for HTML native typography tags. Prose components provide a simple way to customize content UI. You can replace them also with your custom ones. What’s more important Tailwind CSS supports this solution as well, improving your typography a lot.
It’s also noticeable that the H2 heading was rendered as a link. It’s like that because this must be an anchor for the navigation. ID(#id) will be added automatically so navigating, as well as linking to a certain content portion/section will be much easier. There is an option to disable it tho. You can achieve that by defining which heading should be rendered as a link within the nuxt.config.ts file.
Before we step into the second post, and some more advanced stuff I would like to initialize the core of that build - the Docs content. Of course, any intro/landing page will be welcomed, but the most important thing for us here had to be the Docs.
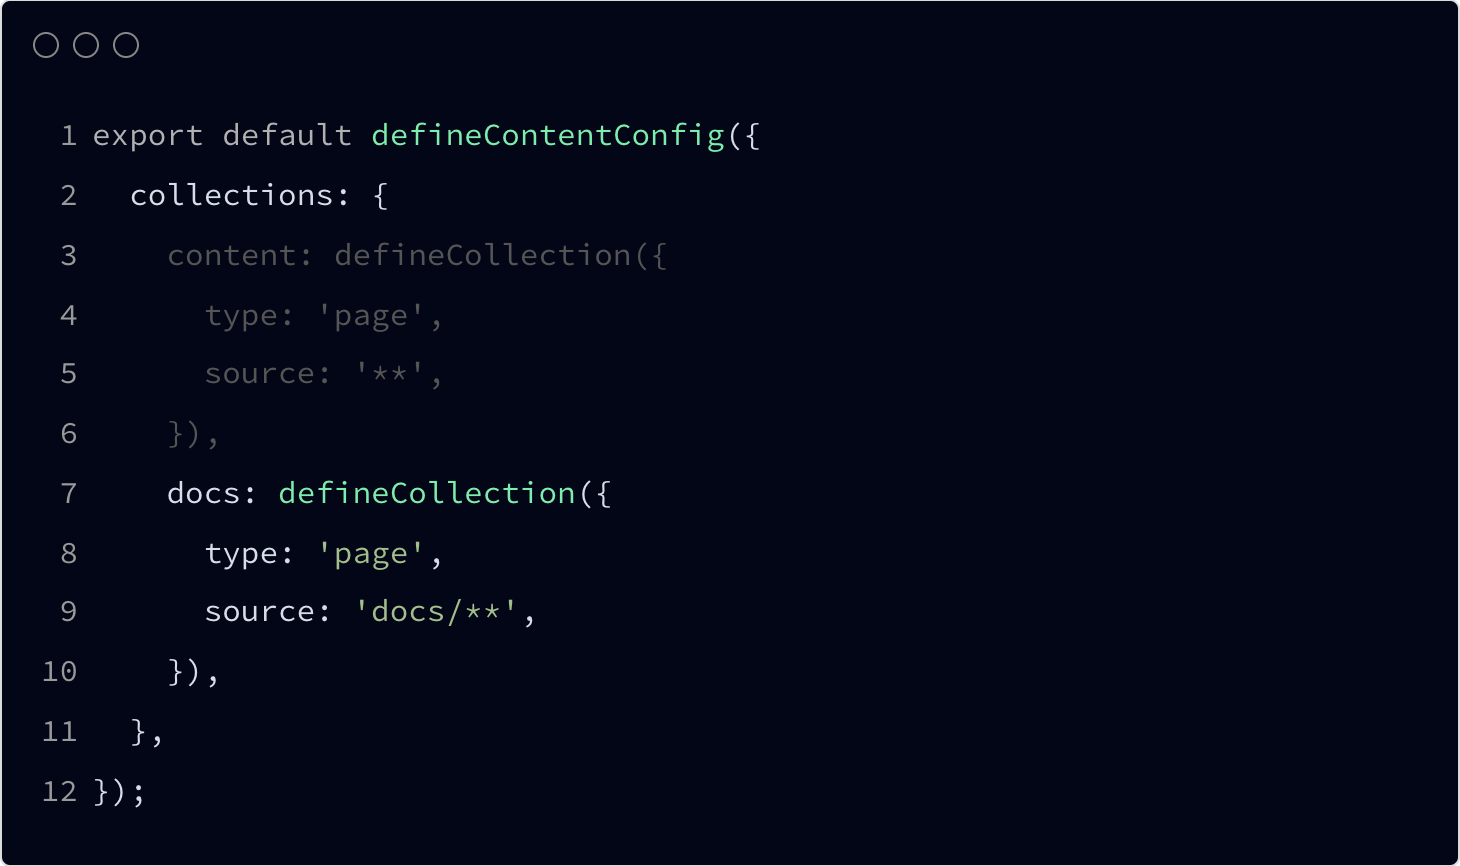
Inside the content/ directory (we’re still in the apps/docs/ context) create a new one called docs/, inside of which add new index.md file. Put the some test content, it can be even the same as for the content/index.md. OK, just after you need to add a new collection inside the content.config.ts file. Something like this.
This way our data fetcher, defined inside the pages/index.vue component will fetch also content from the docs/ folder. But hey, we don’t want that! We don’t need docs content on the landing page. Right? Well, to avoid this kind of behavior we can exclude it from content collection. Do it like that.
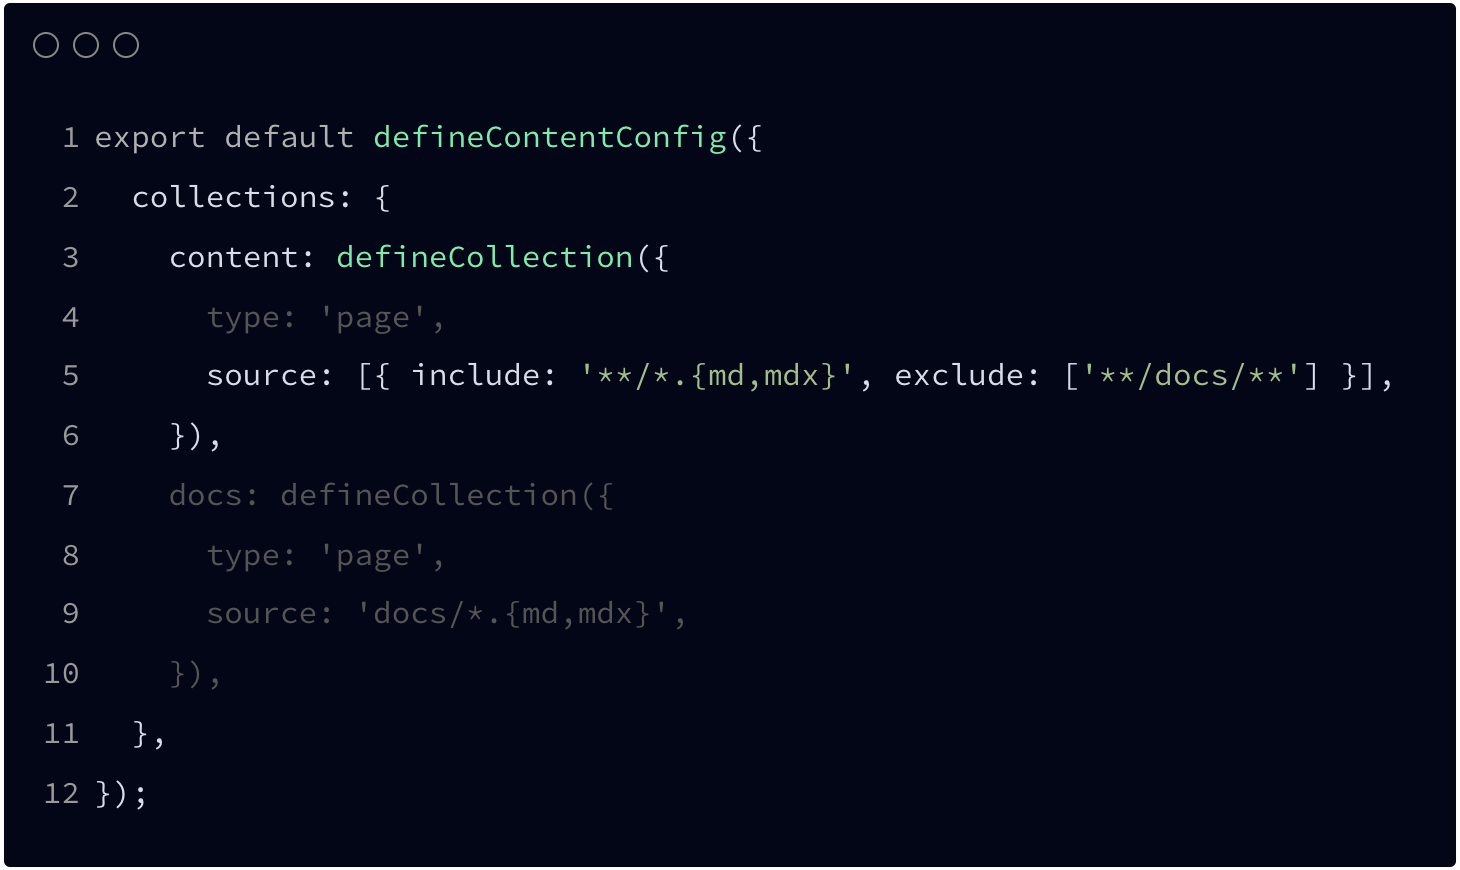
That’s it, now landing page data will be only restricted to what we have inside the main container. Of course when you’ll add more data like docs/ there will be a need to define additional rules for them, but you can proceed adequately.
OK, we can stop here. With another post I’ll cover templates and overall visual aspect of content presentation. If you don’t want to miss it, and you’re not a subscriber yet please join - it’s free, you don’t need account or registration. I promise! Thanks in advance, Lukas. Enjoy!
Please let me know how you find this article. What I can improve?